The Foundation Pattern: Tunic Hack
When I created the Foundation Pattern, my intention was to create a pattern that truly could be a foundation for many different kinds of projects and garments. It not only can be used for a top or dress but also as the base for a Nature Dress, Scrappy Patchy Top, and be adorned with all different kinds of appliqué and embroidery, AND it can also be used to create a tunic!
I love wearing a tunic top with bike shorts and leggings when on hikes or playing in the park with my pup as well as layering them with trousers and jeans for an “art teacher off duty” kind of look.

To hack the Foundation Top to be a tunic is pretty simple. Follow the instructions below to create a tunic pattern using the Foundation Top pattern. You can then use that pattern to make a nature tunic by using the Nature Top tutorial with your new tunic pattern.
To Create the Tunic Pattern

Supplies needed:
Large kraft paper, tracing paper or pattern paper
A ruler
A fabric measuring tape
Pattern weights (or rocks or heavy objects)
A marker
Scissors
Step 1
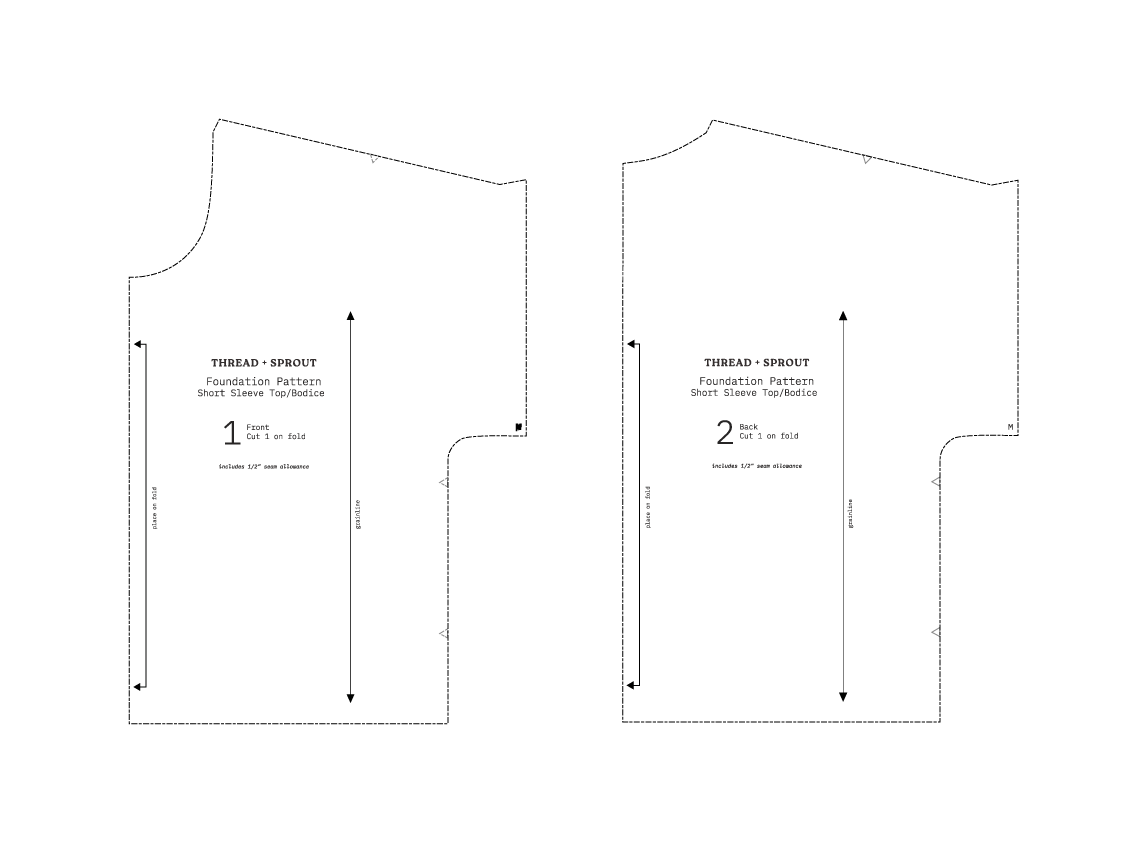
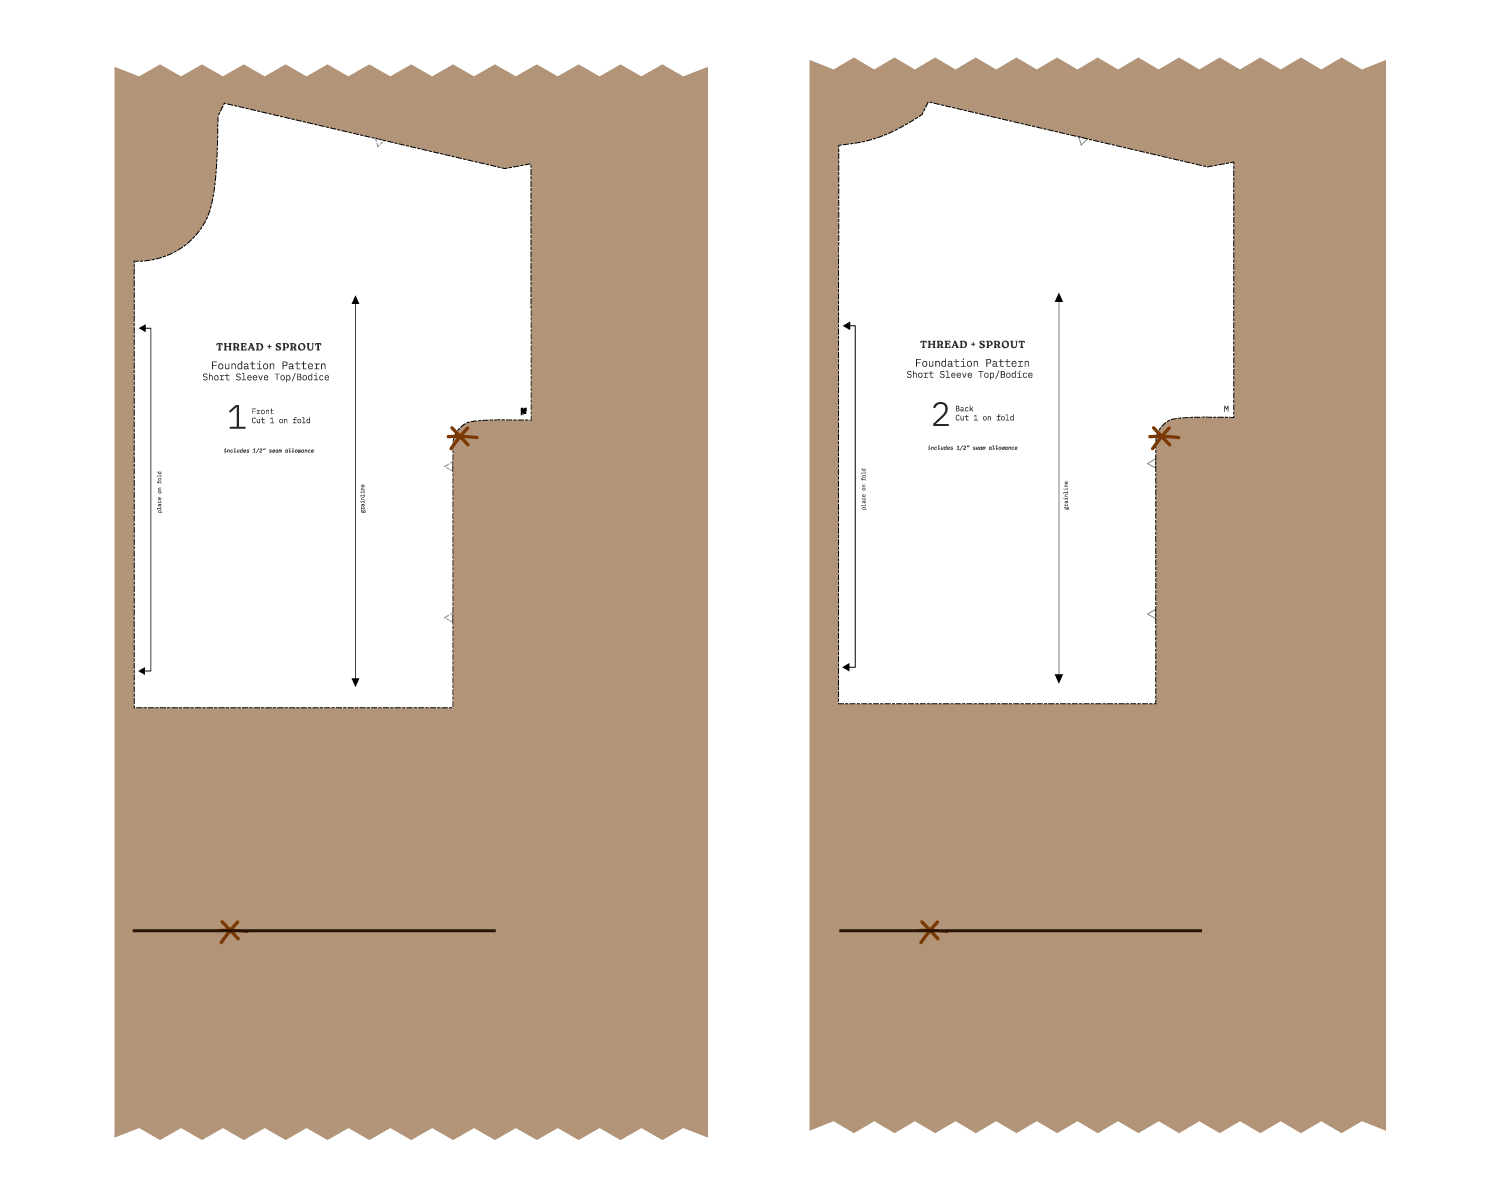
Print and cut out the Foundation Pattern – Top View.
Step 2
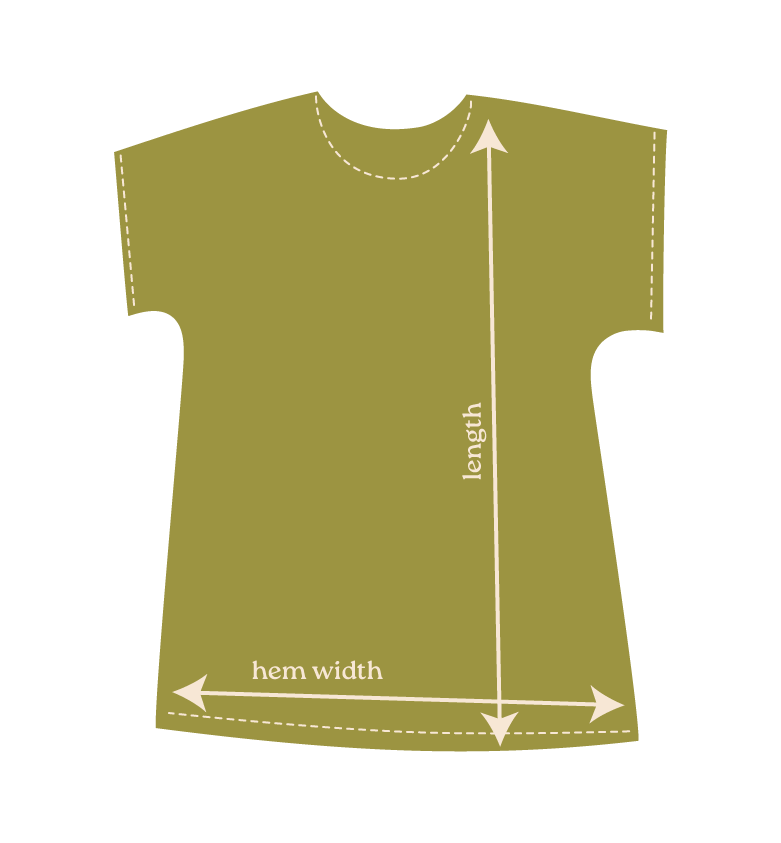
Decide on your tunic length. Measure from the top of your shoulder down to where you want the hem to fall on your legs. Add 1.5” (3.8 cm) to this measurement for seam and hem allowances. This is your tunic length.
Decide on your tunic hem width. Determine the width you’d like for your tunic at the hem. The width should be wider than the width of the pattern at the bust and have enough ease to be comfortable around your hips. Divide this number by 2 and add 0.5” (1.3 cm). This is your tunic hem width.
Step 3
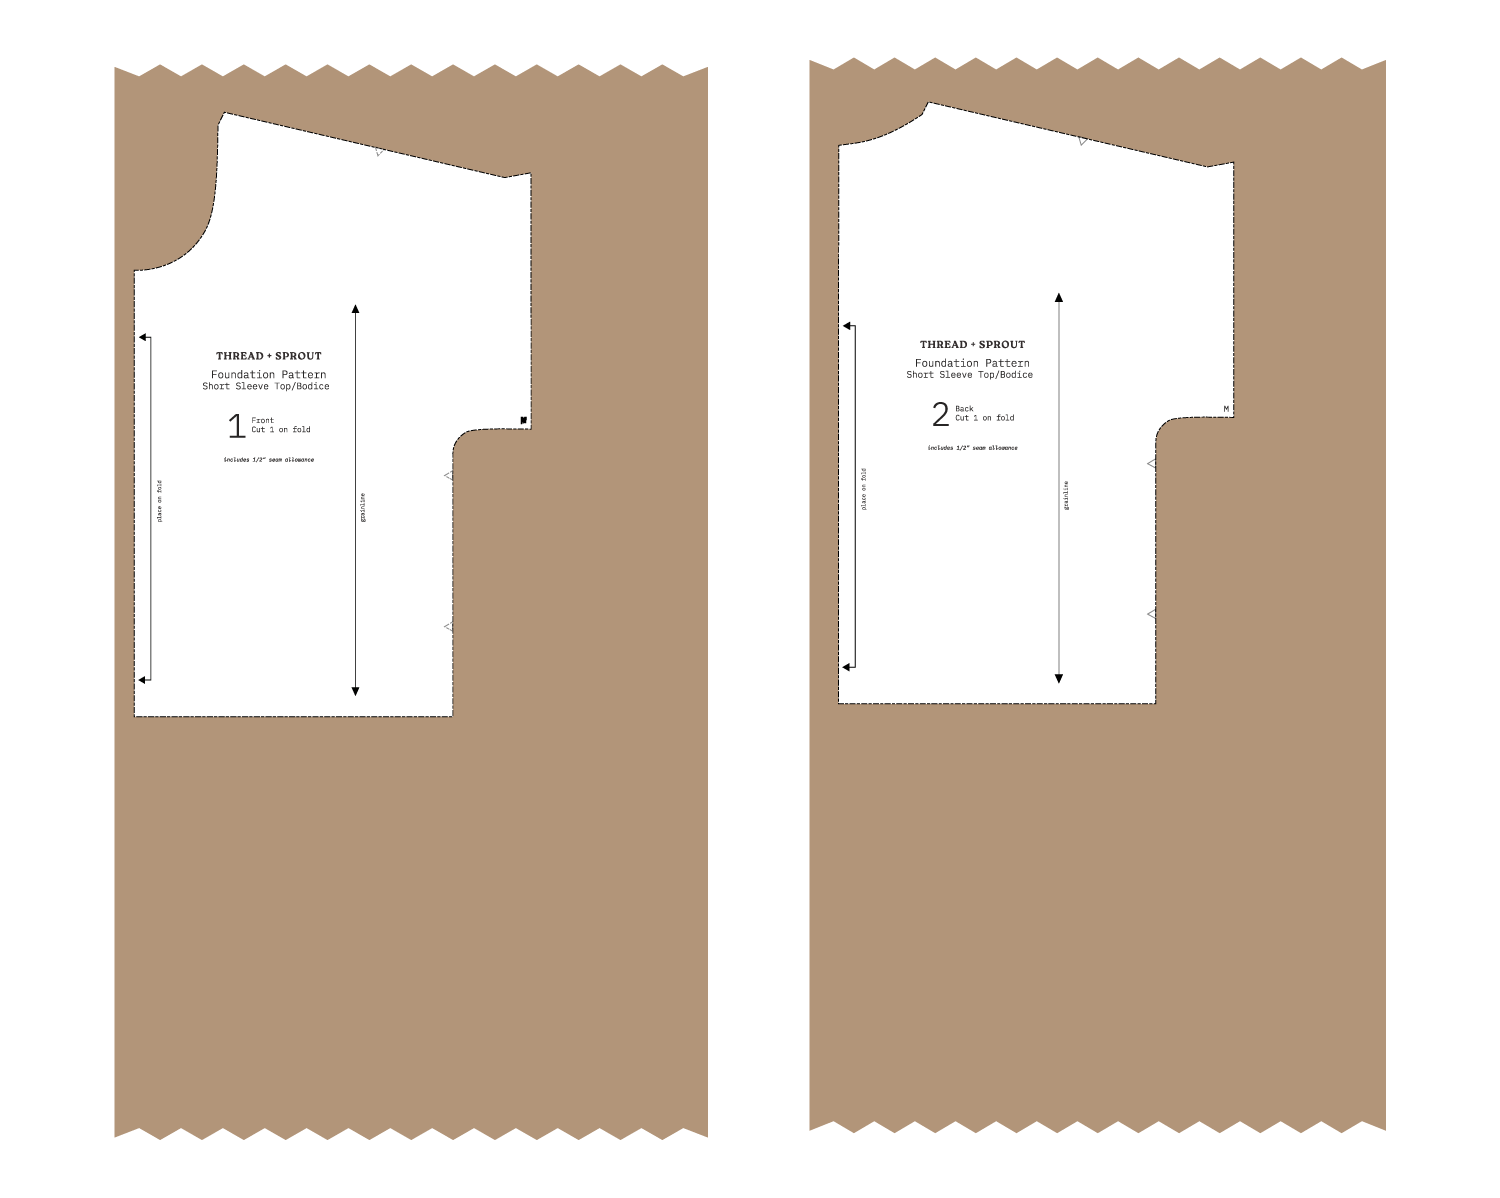
Prepare your tracing surface. Lay out tracing paper or kraft paper large enough to fit both the front and back pattern pieces.
Position the foundation pattern. Place the front and back pieces on your paper, leaving enough room to extend the pattern.
Secure the pattern. Use pattern weights or any small, heavy objects to hold the pieces in place.

Step 4
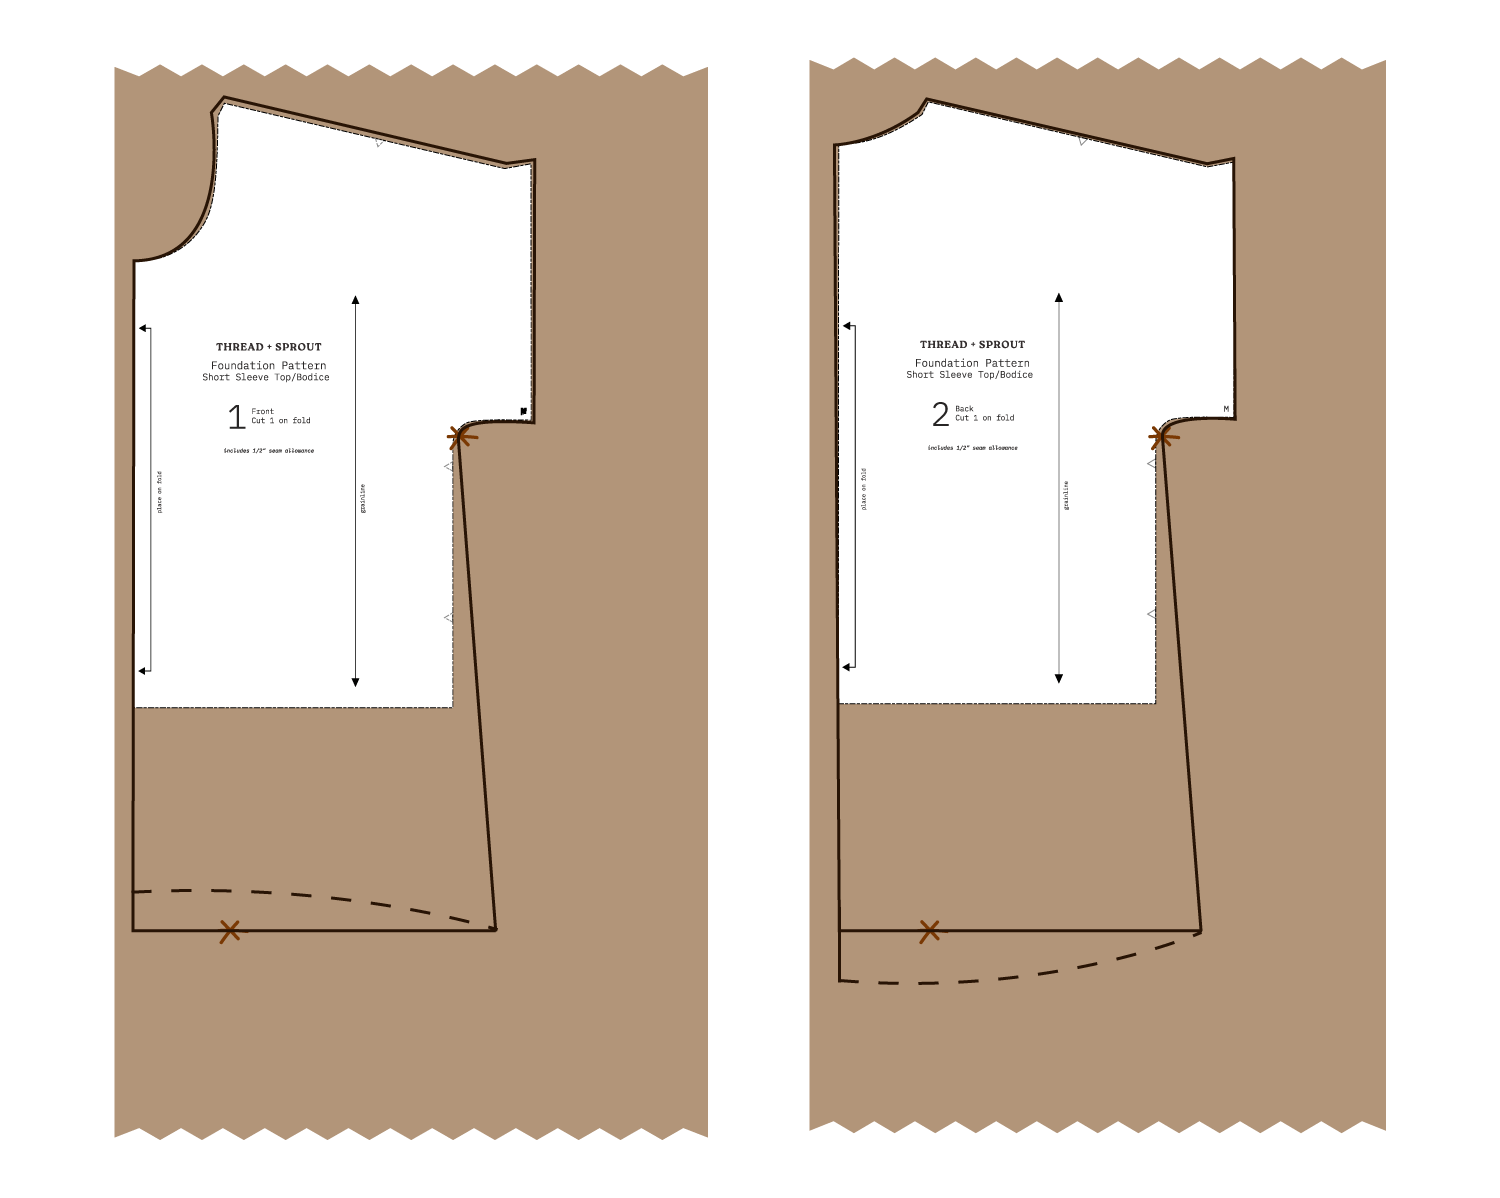
Mark the tunic length. From the shoulder seam at the neckline, measure straight down to your tunic length and mark this point (on both front and back pieces).

Step 5
Mark the underarm. Place a mark at the armpit (underarm seam) of the foundation pattern.
Step 6
Draw the hemline. Using a ruler or straight edge, draw a horizontal line across the paper at your tunic length. Start from the center front (or center back) and extend it to the width you calculated in Step 2.

Step 7
Draw the sides. Draw a straight line from the underarm mark (Step 5) to the outer edge of your hemline (Step 6). Repeat for both front and back.

Step 8
Trace the pattern. Trace the neckline, shoulders, and armholes from the foundation pattern, then extend the center front/back line straight down to meet your new hemline.
Step 9
Optional curved hem. If you’d like a slightly curved hem, draw a slightly curved (convex) hemline on the front and a slightly scooped (concave) hemline on the back. Be sure the side seams match at the same point.
Step 10
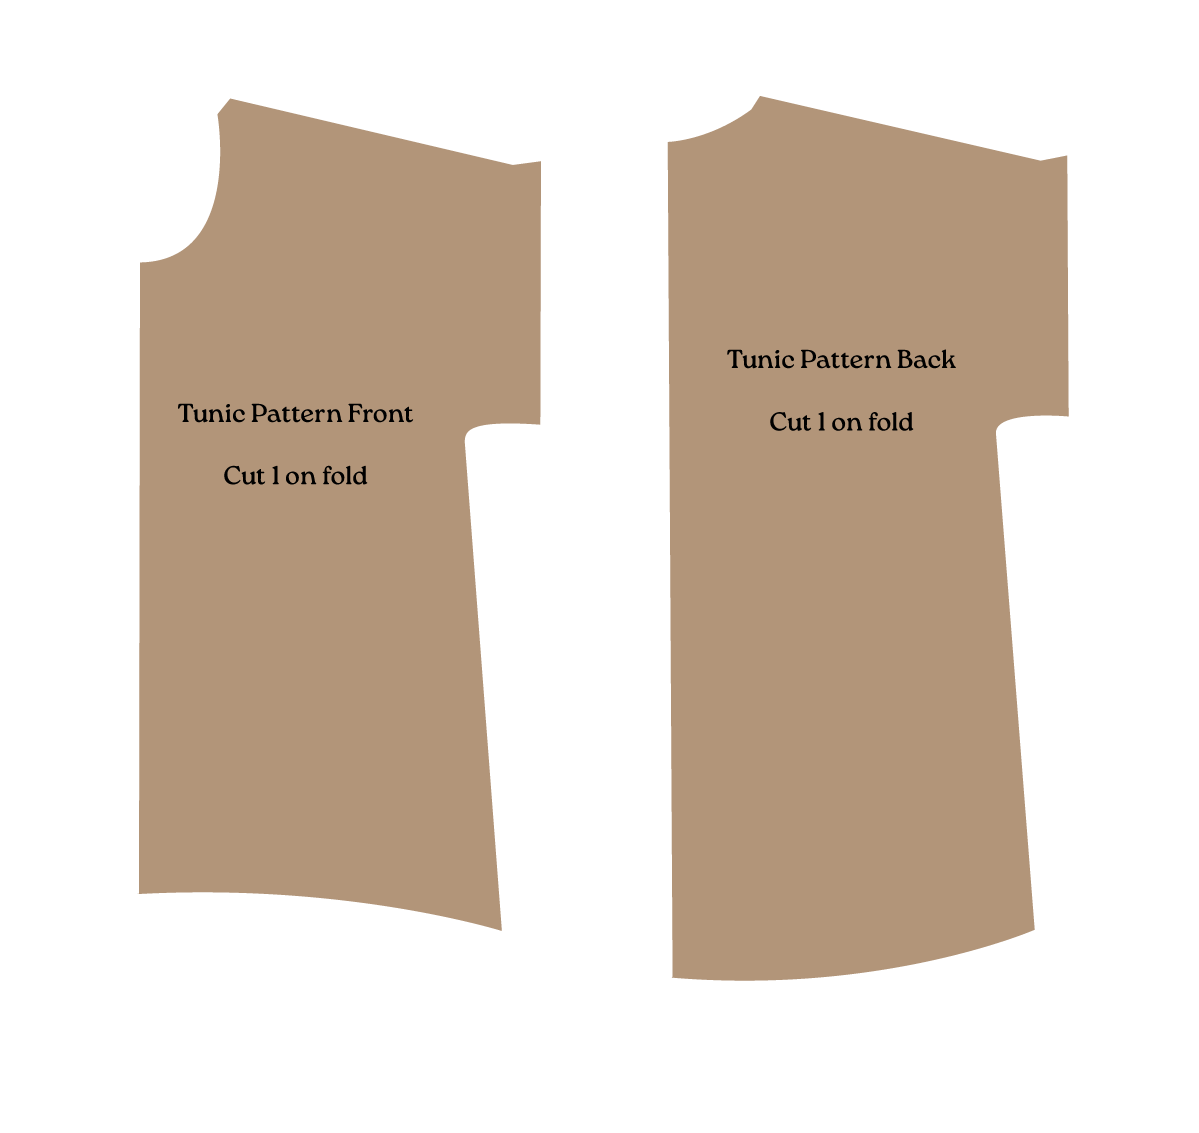
Label and cut out your new pattern pieces. Name your new pattern pieces with your creative tunic name and cut out your new pattern pieces!

Step 11
Sew your tunic. Follow the instructions for the Foundation Pattern Top View to construct your tunic - the steps will basically be the same :) If you are doing a curved hem, it can be helpful to sew a line of basting stitches 1/2” (1.3 cm) from the raw edge of the fabric to use as a guide when folding the hem up and under.
tada! now you have a tunic!
Bonus: Using the Tunic Pattern as a base for a Nature Tunic
If you want to make a Nature Tunic, you will use the above steps to create your tunic base pattern. Then use that base pattern and follow the steps in the Nature Top Tutorial to create the pattern for the curved color-blocking and sew your fabric landscape into a tunic! If you do this, don’t forget to mark your grainlines on the curved color-blocking pattern, as they will be crucial for ensuring your fabric lies flat and doesn’t pucker or warp at the seams.
wanna try it yourself?

Introducing the Thread + Sprout Foundation Pattern! This pattern is for a relatively simple boxy top or dress with options for short or ¾ length sleeves and customizable dress lengths. It is great for beginners who are just starting out on their sewing journeys or for advanced sewists who want a palate cleanser.
You can use this pattern as the base to make your own Nature Top or Dress by constructing it out of curved colorblocking, you could make it out of scraps all sewn together to make your own Scrappy Patchy top, you could paint your fabric or use block printing to make a one-of-a-kind textile design or you could add appliqué and embroidery for some extra special details. You can, of course, use it to make a simple classic boxy top or a comfy, flowy dress!
The possibilities for customizing your Foundation Pattern are endless.
The Foundation Pattern includes sizes XXS - 5X (fits busts/chests that are ~31-66”)
This is a PDF sewing pattern, available to download immediately after purchase. Once downloaded, you will be able to print the pattern either at home or at a copyshop - instructions and options for printing the pattern are laid out in the pattern instructions PDF.
The instructions also include two video sew-alongs for you visual learners - the links to the videos are on the second page of the instructions :D
Find info on fit, sizing, fabric requirements, and more below!
Want this pattern + the Appliqué Adornment Tutorial? Check out the MAGIC BUNDLE!
Adorn your creations with appliqué!
In this tutorial, you will learn how to sew appliqué details to your projects using a turned edge technique with your sewing machine. There are many different techniques for appliqué, some done by hand and some with machine, and this is just one.
Included with this tutorial are several templates that you can use for your appliqué or you can choose to make your own templates.
This tutorial includes:
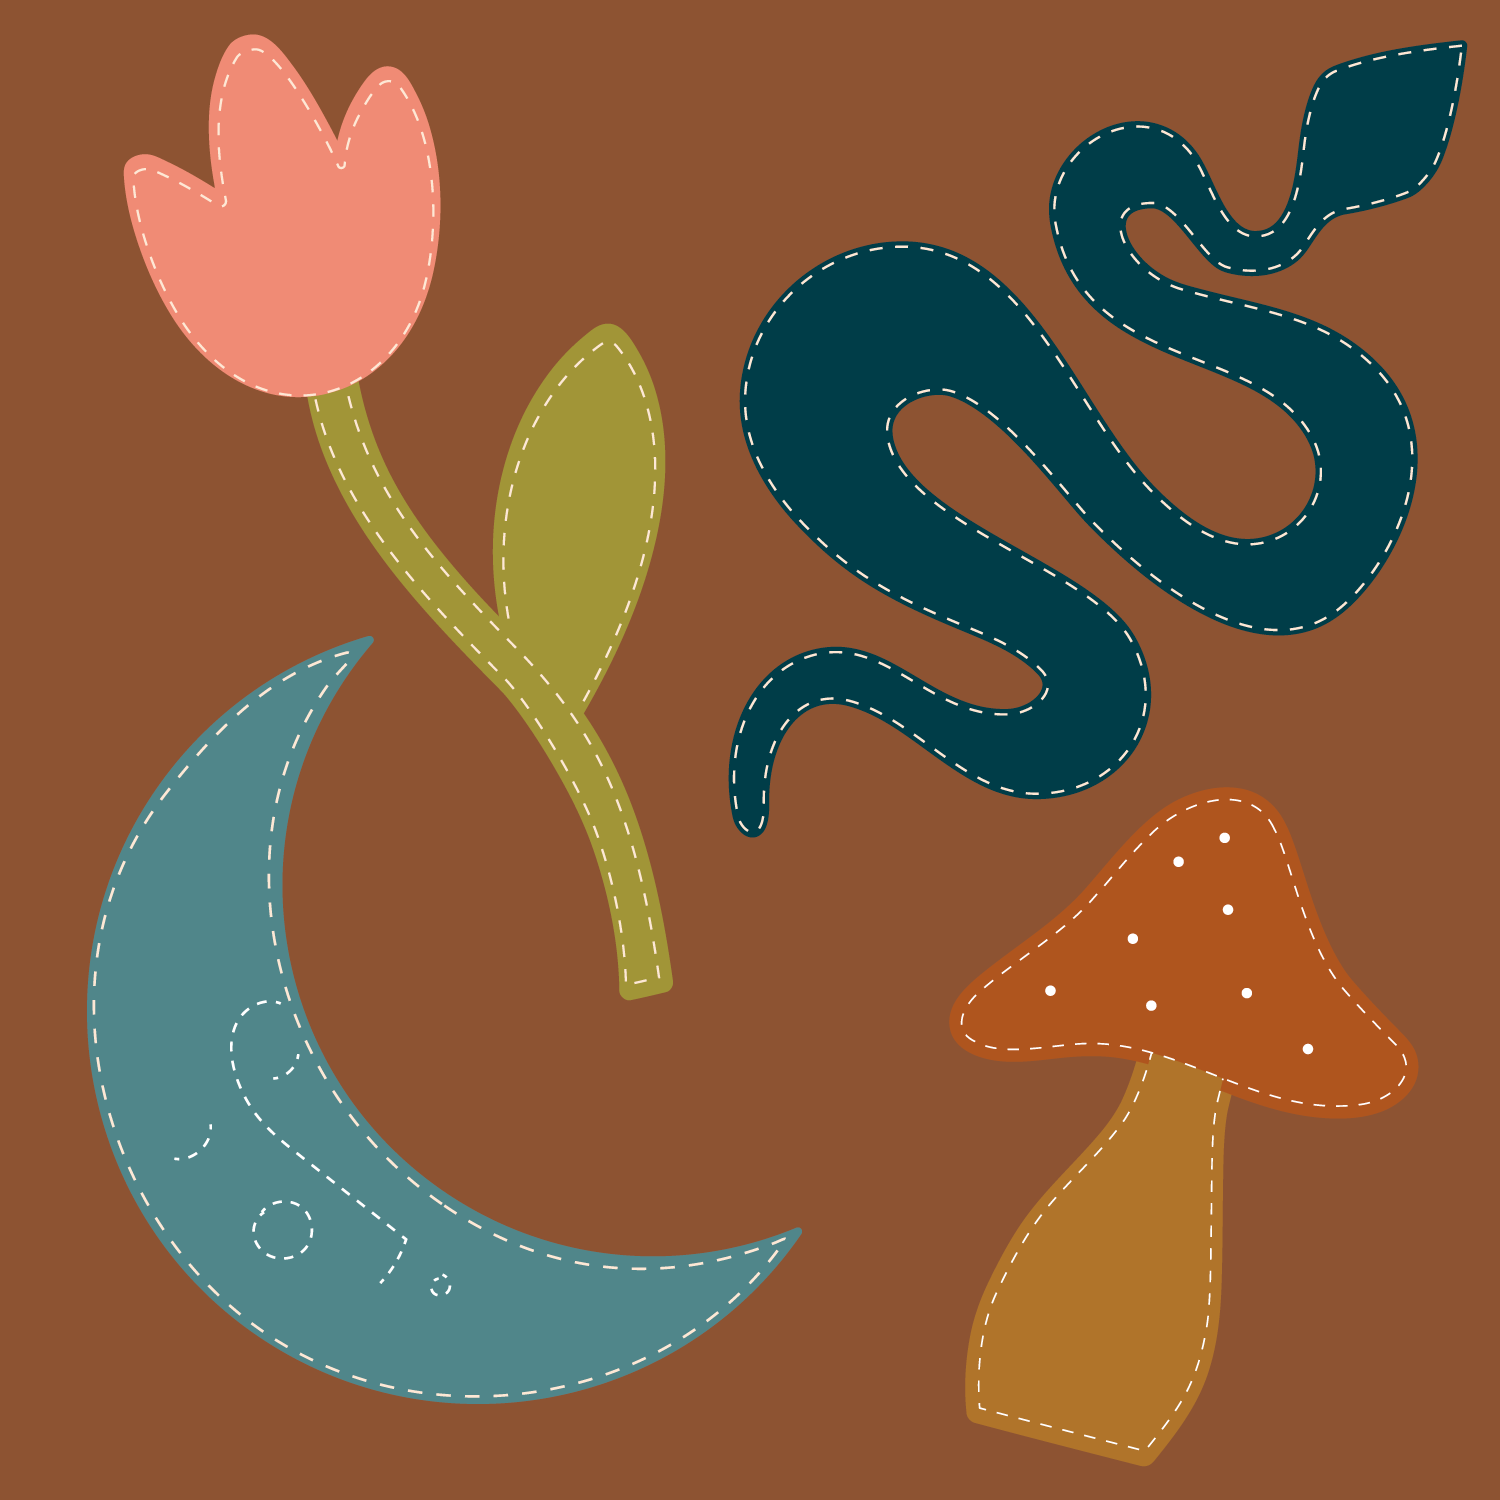
6 appliqué templates (bird, mushrooms, sun, crescent moon, tulips, and snake)
a PDF of written instructions for appliqué and adding details with embroidery
a video showing the steps for sewing the bird, mushrooms and snake (the link to the video is on the second page of the instructions)
This is a digital product, available to download immediately after purchase. The instructions include instructions for how to print the appliqué templates either at home or at a copyshop :)
Want this tutorial + the Foundation Pattern? Check out the MAGIC BUNDLE!
Introducing the “How to Make Your Own Nature Top” Tutorial!
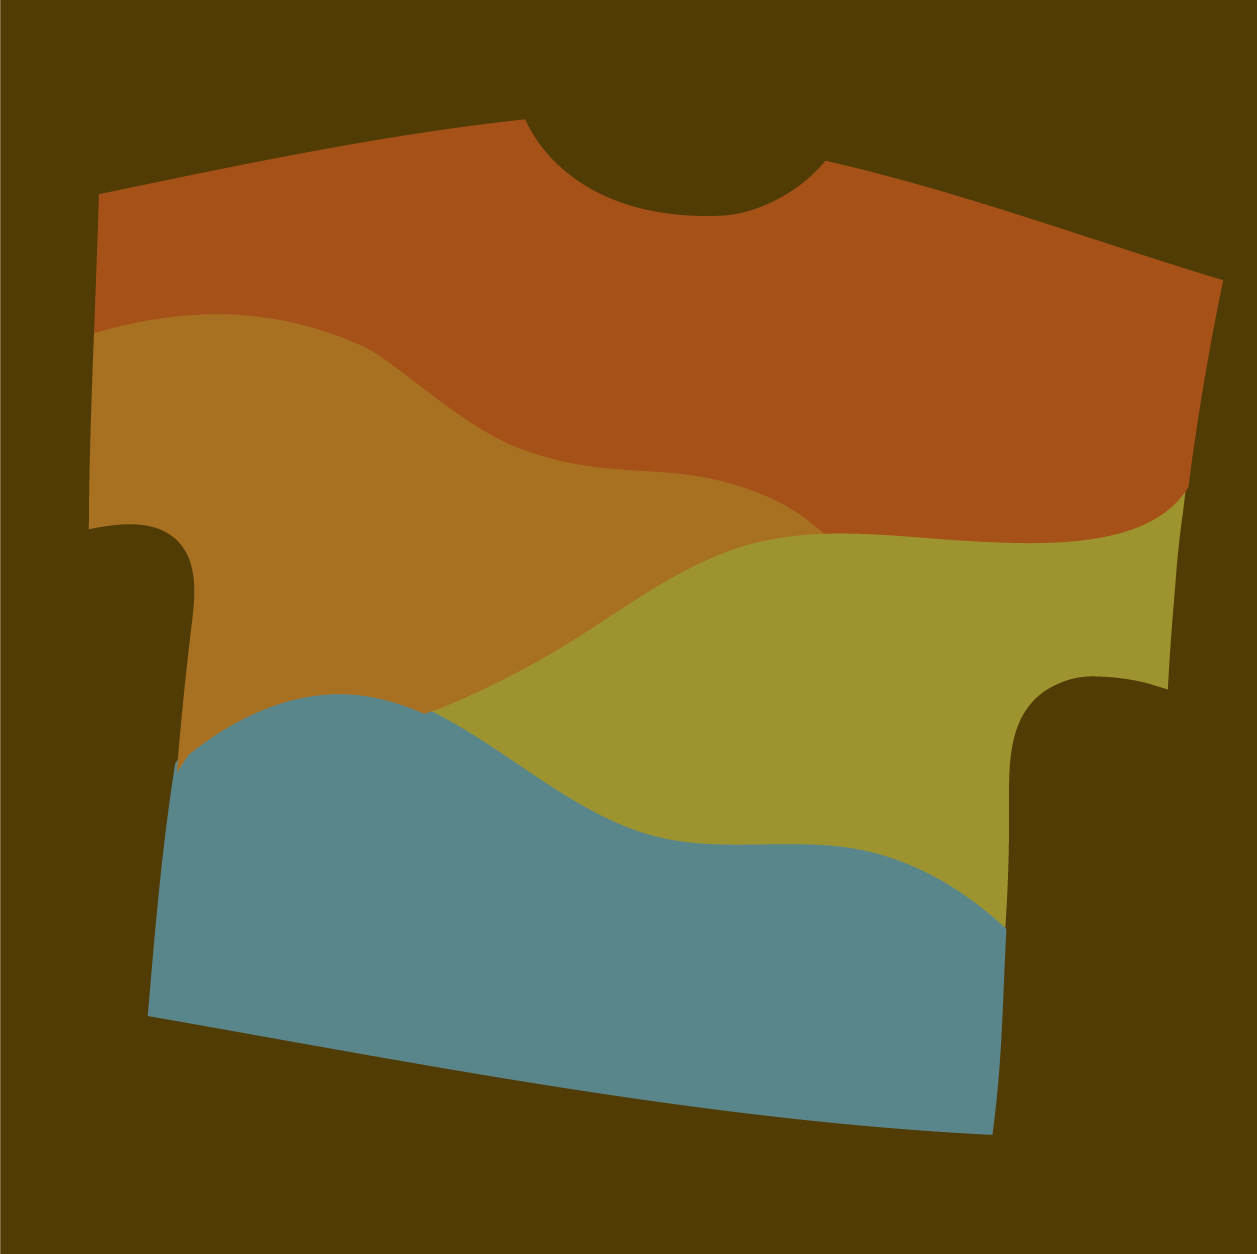
A Nature Top (as defined by me, Justice McNeil, maker of Thread + Sprout), is a boxy top that is made of a few different colors of curved color blocking to look like hills, flowing mist, the layers of the ocean, or whatever else you have in mind.
This tutorial will teach you how to make a nature top using a pre-existing pattern for a simple boxy top. Please note, this tutorial does not include a pattern but will teach you how to make your own pattern for the curved color sections using a pattern of your choosing. This tutorial works great with the Thread + Sprout Foundation Pattern and I have included a few suggestions of other sewists’ boxy top patterns in the written instructions in the tutorial.
If you want to add some cute appliqué mushrooms to your nature top, check out the Mushroom Appliqué Tutorial!
Please find more information below :)
Thank you for reading! I hope that this was helpful as you explore all of the wonderful possibilities available with the Foundation Pattern!
xoxo
Justice